Various devices are available in the cleanroom laboratory for characterising the processed samples.
Ellipsometer
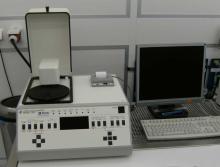
This device can be used to examine the thickness and refractive index of transparent layers between approx. 1 nm and 2 µm.
Ellipsometry can be used to optically characterise transparent layers in a non-destructive manner. Refractive indices can also be determined. A circularly polarised beam of light hits the sample at an angle (e.g. 70 °) and interacts with the lattice planes of a thin layer. The reflected beam is elliptically polarised and is evaluated with the optical system. The Woolam M-2000 spectroscopic ellipsometer enables the investigation of individual transparent layers as well as layer sequences on substrates in the wavelength range 190 - 1000 nm. Microspots (60 µm) enable targeted focussing on individual structural areas.
The owner of this device is the Fraunhofer Technology Center for High Performance Materials. As part of a cooperation agreement, it was installed in the Central Cleanroom Laboratory and is operated here.

Four-peak measuring station
The thickness of electrically conductive layers can be determined by attaching four measuring needles.
The thickness of electrically conductive layers can be determined with the 4-tip measuring station. Four measuring needles are placed on the sample and an electric current flows through two of them. A voltage drop can be measured between the other two needles. By knowing the electrical resistance of the coating material, the thickness can be determined. The 280PI model with collinear tip arrangement from FOUR DIMENSIONS allows automated 1-, 5- and 9-point measurements in the resistance range 1 mOhm to 800 kOhm. The maximum sample diameter is 150 mm.
The owner of this device is the Fraunhofer Technology Center for High Performance Materials. As part of a cooperation agreement, it was installed in the Central Cleanroom Laboratory and is operated here.

Microscope
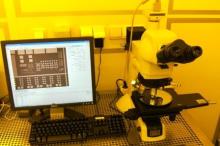
A microscope (Nikon Eclipse 150) is available for checking the processed samples. It offers 25 to 500x magnification, differential interference contrast and interferometric thickness measurement at 50x magnification.

Profilometer
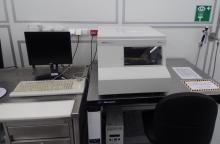
In a profilometer, a fine measuring needle is moved along a line over the sample. Depending on the height profile, the surface can be scanned in this way. The deflection of the needle is registered and recorded by a laser system.
Further analyses are carried out outside the cleanroom. For this purpose, the Institute of Applied Physics has a laboratory for electrical characterisation and an optical laboratory. Thanks to collaboration with other institutes, a wide range of other examination methods are available.

Glovebox
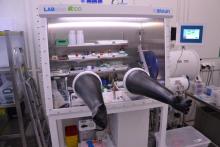
An inert gas glovebox is available for handling air-sensitive substances.
The inert gas glovebox is used to work in a hermetically sealed atmosphere free from oxygen and humidity. This is important for materials and samples that degrade or oxidise in air, as well as for handling hazardous substances that are pyrophoric (self-igniting), such as some organometallic precursors for atomic layer deposition.
M. Braun Labstar: Nitrogen inert gas glovebox with <1 ppm oxygen and humidity (sensor-monitored)
- Gas purification system (permanent absorption of O2 and H2O)
- Solvent filter (activated carbon)
- 2 airlocks (main airlock and mini airlock)
- Box rinsing device
- Eco mode for consumption-optimised operation